Sunday 30 June 2013

Hood fittings

Just a little progress, some practice with the fabric I picked up; 1000D PU Cordura & M75 thread.

The seam of choice would appear to be a 'flat felled seam' same as on jeans etc & my practice runs came out ok. This shows the detail on the fabric; matt Cordura finish on the good side with a waterproofing coating on the back:


I made my life a little difficult by not wanting poppers on the front edge of the screen - the leading edge of the hood will have a 4mm ali rod through it and held in place at three points by smaller brackets. The progress today was to work through the design of the bracket to hood fixing; with a couple of mockups and final paper pattern:


These pockets will sit just under the hem (upside down in this picture) which has the leading edge ali rod & stop it riding up:

Still not quite decided if I need a separate cut for the windscreen surround or try and make it out of a single piece,  no rush, just solve it one piece at a time.

Using contrasting thread might come back to bite me, but its got to be worth a go; provided I'm reasonably neat with the sewing it will look great.

Update - the half hood is on hold until the weather gets worse - too busy driving the car at the moment!

Friday 28 June 2013

Projects in progress - half hood & digital speedo

Half hood

I have a couple of projects progressing currently, the first a half hood - awning type cover. I'm going to give it a go myself. Materials are already ordered from Ebay some Cordura fabric & thread; Today I worked on a simple model of the windscreen & roll bar to start to identify the shape I want & start to get a feel for the cutting pattern:

Granted paper & fabric don't behave the same way - but it helps to visualise the situation. I have slightly different fixing points to the norm, I'm not going for a line of poppers along the front of the windscreen surround:

I've not really done any work with fabric before, so no guarantee this will work; I think the next step is a mock up with some old sheets to work out a cutting pattern:

Digital Speedo

My other project is a digital speedo. Nothing wrong with the Smiths clocks I have, but I'm used to a numeric speed readout to keep on the right side of speed cameras & average speed checks.

I confirmed with Smiths that the existing 'bolt detector' speed sensor can drive another unit, so I'm playing with an Arduino Nano board and LED 7 Segment display to see what I can come up with.

My display driver is written so I can display text & fixed point numerics, Frequency measuring code also written for frequencies around 3-300hz = 1-100mph down to 10ths accuracy & I have the basic sensor circuit in place to drop the 12v sensor signal to 5v. I could do with a frequency generator to fully test my code - so either I need some more code for the Arduino to generate a known frequency using a spare clock and output pin or or hook it up to the car and see how we go.

The trick, I suspect, will be adding the right level of averaging/damping in the code to get a stable/usable speed display:

There is lots of potential here for an accurate distance/trip meter, 0-60 acceleration clock, lap timer etc

All just work in progress so far.. just depends if my mood is debugging code or sewing as to which makes progress next.

Monday 17 June 2013

High level brake light

Minor mod; addition of a third brake light, this is a LED unit but 12v rated so no need for extra resistors it wires directly into the loom. I took the +ve line to the brake pressure switch under the boot floor with a piggy back spade connector & the ground to the rear loom ground point.

I'm using a Carpoint 1510090 28 LED light unit, some of these lights also have a little 'stop' sign in the middle, I got one without & covered its mounting holes with a little black plastic. so should be reasonably weather proof. I also adjusted the mounting feet by removing a little of the rubber adhesive pads so it sits a little better on the round tube. The light is designed to fit on a rear windscreen or parcel shelf so will rotate - thus even though I did my best to mount it vertical - the angle can be tweaked up/down to aim the light correctly.

Mounted with 2x M4 bolts into tapped holes in the roll bar + the adhesive pads that come with the light:

I wanted to hide the wiring as much as possible so routed through the roll bar with a grommet either end to keep things tidy. For the exit point I couldn't see a straightforward way to drill a hole in the underside end of the bar without removing the offside wheel & shock, even then its possible there is no room for a hole - so instead discretely took the wire out just behind the drivers seat and down into the boot space, fished through with some garden wire:

Testing - all looks fine & a little more visible in the eye line of following cars. TBH my experience so far is most cars keep a wide berth behind - theres always the type that likes to sit on your bumper but most people give you plenty of room.

I did think about the option of a flashing unit - which can be added into the loom - it seems like its only legal in the UK if it flashes during emergency stops so decided against it.

Friday 14 June 2013

Wind deflectors

I thought I'd try and make some wind deflectors & after consulting on RHOCar for some examples and experience the advised material was PETG, easier to work than acrylic and less brittle than Perspex. I was expecting to have to practice so bought a piece 1m x 500mm  x 4mm thick from Ebay.

I had a couple of goes at templates to get the right shape and for now ended up on a simple rectangle around 500mm x 180mm with folds in appropriate places, transfered the cardboard shape to the plastic and cut out with a jigsaw; installed the hinges held temporarily by the bolts only so I could test the fit on the windscreen frame.

The PETG will bend with gentle heat from a hair dryer; so I rigged it up to bend under its own weight and a little persuasion from some scrap wood; it produced more gentle corners than I was expecting:

First couple of fits got me close:


Then for final fit I removed the covering anti-scratch film and bolted the hinges in place, for now I think I'm leaving the very basic rectangular shape:

Finally I worked the bottom edge against the scuttle shape with more heating and gentle pressure:

My daughter volunteered for a test drive & she said It makes a difference, a little less blustery than before - so next up will be making a similar one for the drivers side. It does seem quite a soft material so I'm not sure how it will stand to scratches, but nice to work into any shape.

Update - While they don't stop much wind the deflectors are invaluable in stopping the front wheels firing whatever they drive over into your face, the angle is just perfect to project any debris around the windscreen pillar at you or the passenger - be it mud, water etc the deflectors are a really useful addition to the design.

Update - These were replaced with a newer design here, and then later I reverted back to these.

Update - Replace in 2017 with acrylic versions to match the sun visors.

Saturday 8 June 2013

Sunny Day - Gallery

Sunny day - shiny motor @ Dad's house:


Perfect opportunity to use a picture of my own car for the blog header.

A good run out, 88 miles round trip (its 70 miles by the map, the other 18 were a scenic route to enjoy the car), I got some practice in negotiating speed bumps & made a note to adjust the rear ride height - its a little low right now meaning the seat bolts ground on speed bumps & smaller road bumps & the offside rear tyre touches its wheel arch.

I think she is doing something like 20mpg - keep in mind I wasn't holding back with acceleration, so thats not too bad either for the stock Powermap, certainly no rush yet to get the ECU tuned.

Friday 7 June 2013

First run on the road


All set!

One road legal GBS Zero!

Home built from a van full of parts, a list of extras from various suppliers & a little spare time :)

Just time to take her for a spin this evening, fill up the fuel tank & quick round trip down the lanes to Staplehurst - my daughter volunteered for the test run - windy, but great fun. The windscreen makes all the difference - its still windy - but you can drive without goggles:


I still have some parts to fully complete but we are basically done...  I think it came out all right; in fact I'm very pleased with the result. I'm not a perfectionist - I don't have the patience for perfection, on the other hand I do notice & it niggles me when things are not 'right' - while this might not be a concourse Zero - its pretty close - certainly a pretty car & a damn decent drive!

The learning process as a positive part of the build should not be understated: Research on the internet, drawing on experience from previous builds and club members as well as the physical build are all part of the process. Its not a Lego kit where you learn how to follow step by step instructions, or even Meccano where the instructions are typically more sparse - its more like the mental experience I recall from first getting into computers in the early 80s as a teenager: old bootlegged C64 games back in the day when you had to hack & discover the keystrokes & controls to play -or- Learning to programme - some knowledge from books & magazines, but a lot by thinking through the problem, identifying solutions and then trying things out until you find the solution you are going to go with.


Now what shall I do next?
  1. The fuel gauge is fun right now, it works ok but needs calibrating (read float wire bending) - shows full when the tank is about 2/3rds full, and empty a little early.
  2. Straighten the steering wheel - needs shifting 1 spline over and/or track rod ends adjusting
  3. Rear wheel arch stone guards
  4. High level brake light - ordered but not fitted
  5. Rear number plate lamp wiring re-routing
  6. Behind seat anti bluster screen
  7. Half hood - project
  8. Doors - project
  9. In car basic tools, wheel brace etc
  10. Spare wheel cover
  11. ....


Perhaps there will be enough to keep me busy. During the IVA process I also had this idea for a boat... not to build... just to "mess about on the water"...hmmm

Number Plates

I had the plates made up at a local garage, I also have some on order which are a little more minimalist - i.e. don't have the border or 'in your face' garage name & cut down the front plate size to the legal bare minimum. But these will do for now - the important thing is to get the car on the road.

Front

There is a small plate bracket as part of the kit - now with hindsight & 12 months experience building the car this is the sort of part I could easily make myself. Simple ali bracket which bolts to the underside of the nose.

I also took the opportunity with the nose off to remove the indicator extensions - I've been eyeing up some small motorbike style indicators but resisted buying so far. Currently fixing the plate with adhesive pads:

Rear

The back plate either fixes directly to the rear panel, or when my spare wheel is in place needed a couple of brackets on the spare tube. I had two stainless brackets from the original reversing & fog lamps which were perfect:

My two brackets, drilled & riveted, sitting behind the plate, & a nice small number plate lamp which is stuck in place & temporary wiring routed up to the original lamp which is still on the back panel. The dangling wire is temporarily held taught but in due course I need a better route for it through the spare wheel bracket itself:

The tiny number plate LED lamp is actually E marked from CBSOnline; I'll check it out in the dark to see how much it actually illuminates.

I think thats the last step - fully road legal!

Update - The number plate lamp sends light in all directions, including backwards. I've masked up and painted the back face so it doesn't show white light behind.

Windscreen Washer

The washer bottle slides over the bracket on the nearside footwell; connects to the loom and a pipe which takes the water to the washer nozzle:

Underside of the washer nozzle; Backup tie wrap holding the pipe on:

Tested, adjusted the nozzles to actually spray water on the screen & job done. I'm sticking with water only for now, I don't really want washer fluid all over the car & probably the passengers on the rare occasion the washer is used (i.e. probably only at MOT time)

Wipers

ECU out temporarily so I could re-install the wiper motor and wiper gearboxes - straight foward - but awkward and fiddly to get everything re-assembled. The wiper motor plug on the loom was loose so a little tweak on its pins to make a good connection then re-install of the ECU in front:

Originally I was thinking the wipers should park on the nearside as per standard practice, however the scuttle holes are positioned centrally so they need to park drivers side for maximum sweep/clearing in front of the driver.

I made up a cardboard template to work out the arc - the limiting point is at park the wiper blade must sit on the bottom edge and at 90º it must miss the top of the windscreen. I lined up the top edge of the wiper with the top of the frame - hindsight - I should have probably lined up the middle with the middle to end up cutting the same length of each end of the arm:

Then offered up the wiper arm and worked out the bend & cut points. The arm will bend, masked up to avoid marking the surface then applied a little brute force with the help of the vice & my large adjustable spanner:

I temporarily took the springs out of the blades before any fitting up to minimise the chance of inadvertently scratching the glass. The arm also takes a slight twist to try and get the wiper blade square against the glass. Then ran the wiper motor and marked where the blade needed a little trimming at either end:

Similar process on the nearside wiper & we pretty much have a matching set. Its not perfect, I may re-visit if it bugs me too much. The wiper blades slide on the arms and positively locate with a 'nub/lug' however shortening the arms removes this lug - I decided for now to glue them in place with a little Sikaflex/black panel glue - again possibly another one to re-visit - the other option is to drill a hole and either rivet or self tapping screw in place:

Update Jun 2014 - Re worked the wiper arms and blades to join/pivot centrally here

Wednesday 5 June 2013

Windscreen - final fit

I've read a fair few blogs running into issues with the windscreen frame fitting so wasn't really looking forward to it. Consulted with Simon B on RHOCar & I  found a blog with pictures of the process (on a 2B): Colin's 2B windscreen frame fitting (site no longer exists)

Glass into the frame

Inserted the flat rubber strip around the curved frame & cut it to the right length either side to allow the bottom rail to slide home. Then squirted a bead of washing up liquid around the rubber & worked it in with my finger.

I was expecting to need the ratchet straps to push the glass in, but it simply slid into place with gentle pressure & a little care on the corners where the rubber rippled:

Then the bottom rail, I used the same procedure - rubber strip inserted, a little washing up liquid and slide onto the bottom of the glass. This time I'm using the ratchet straps to hold everything steady while I consider the next step - fixing the bottom corners:

I don't know what I did different to other builders - Simon @ GBS said it should go together fine & pretty much it did!

Frame bottom corners

I toyed with the idea of a bracket on the outside of the frame, but in the end went for the GBS method on the corners. A diagonal self tapping (well wood screw) diagonally across the corner.

The only place to really trip up here is damaging the glass while drilling and fitting. So carefully angled a 3.2mm hole in from the side rail and into the centre of the bottom rail:

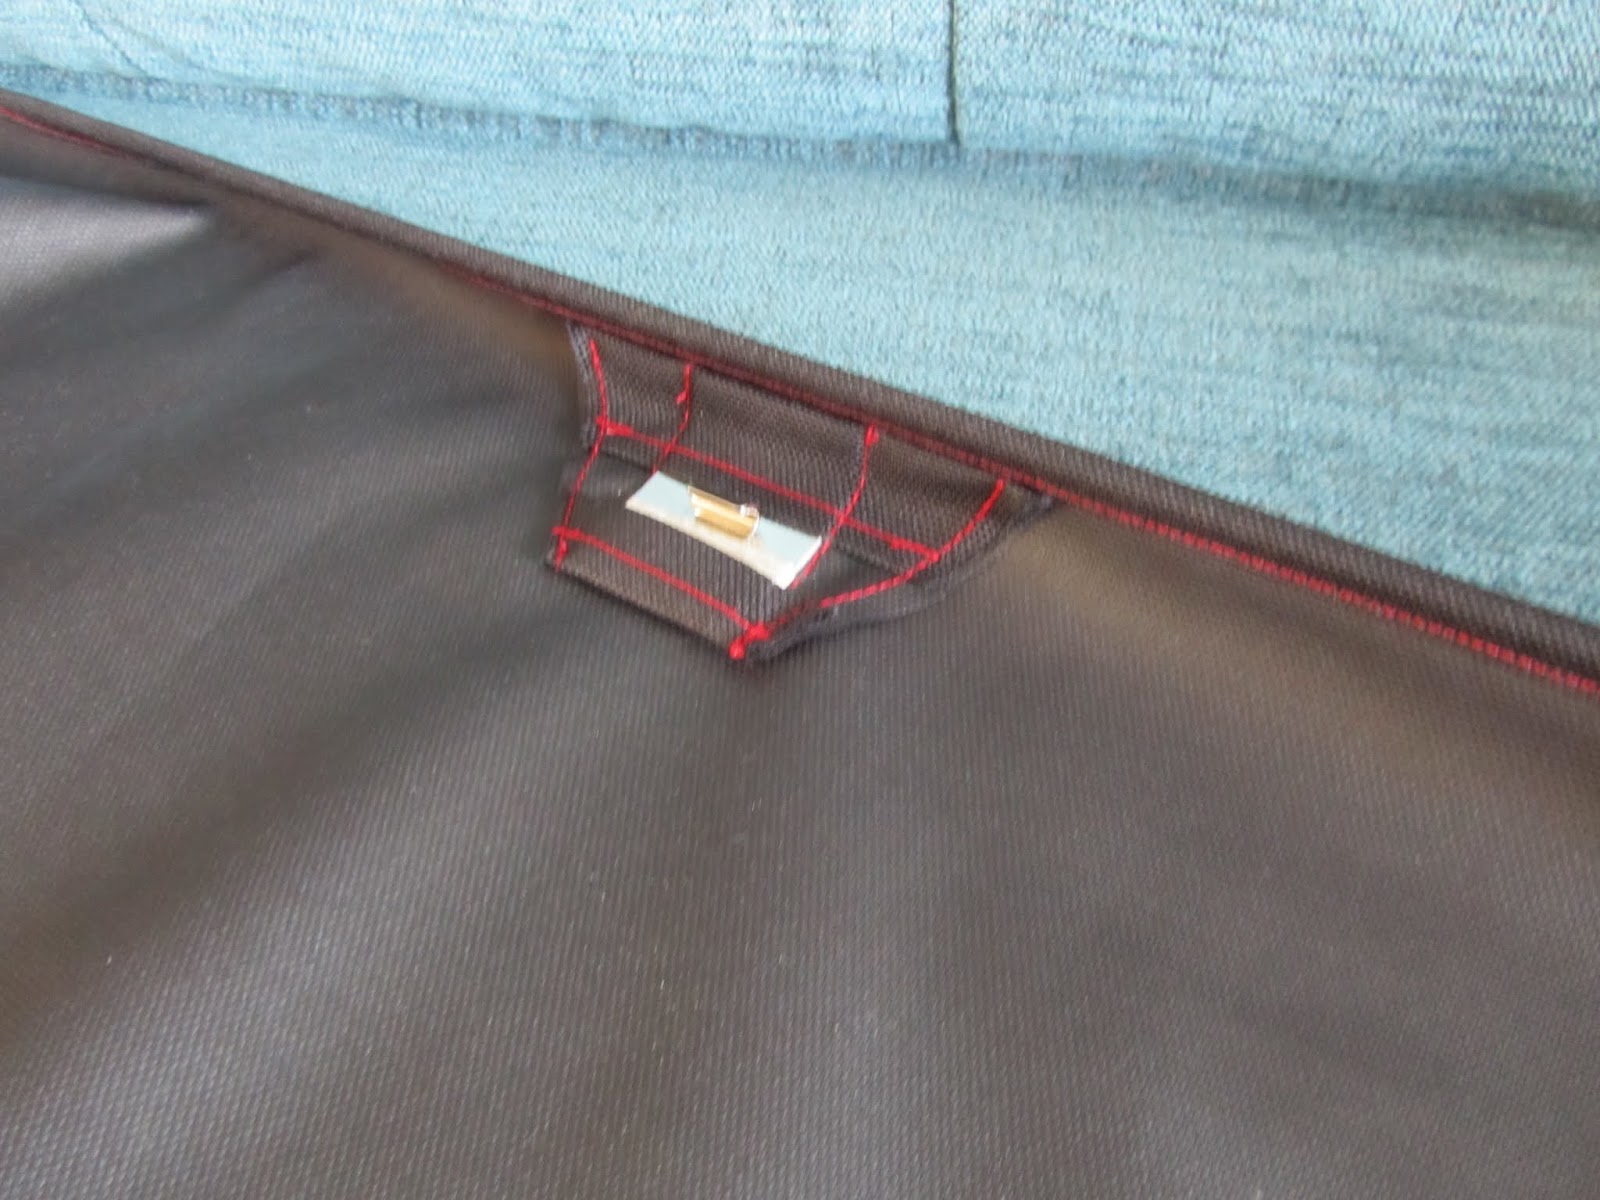
There's not much metal for the screw to grab so I also made a couple of reinforcing places from scraps of stainless. These slide into the bottom rail and gives the screw something solid/hard to grab:

This shot is just offering up the screw, I then measured the length required and cut the end of the screw so it only just protruded from the bottom hole:

Finishing

Once I knew the fixing method would work & the nearside held in the correct position I swapped to the offside side and duplicated the process. Although the bottom 'T' sealing strip can be slid into the grove in the bottom rail it means you cannot then see what you are doing to screw the corners in place - so - I screwed the corner together then carefully pushed the bottom rubber strip into its grove with a screwdriver:

The screw heads either side were mostly countersunk in place, but not too much to weaken the side frame. I used the Dremel & grinder head to smooth the screw heads flush with the frame. Theres just enough of the phillips head left meaning I could dismantle if I needed to:

Finally cut off the excess rubber strip with a sharp knife, as per Colin's advice angling the knife very slightly into the frame and taking care not to mark the glass:

Job done.. 

Fitting

I painted the windscreen uprights initially with brush on hammerite - mistake - too thick !
So sanded back and used hammerite black silk spray paint which gave a much nicer result. If the registration paperwork hadn't arrived I may have even got these powder-coated - but I need to get the car drivable while the weather holds!

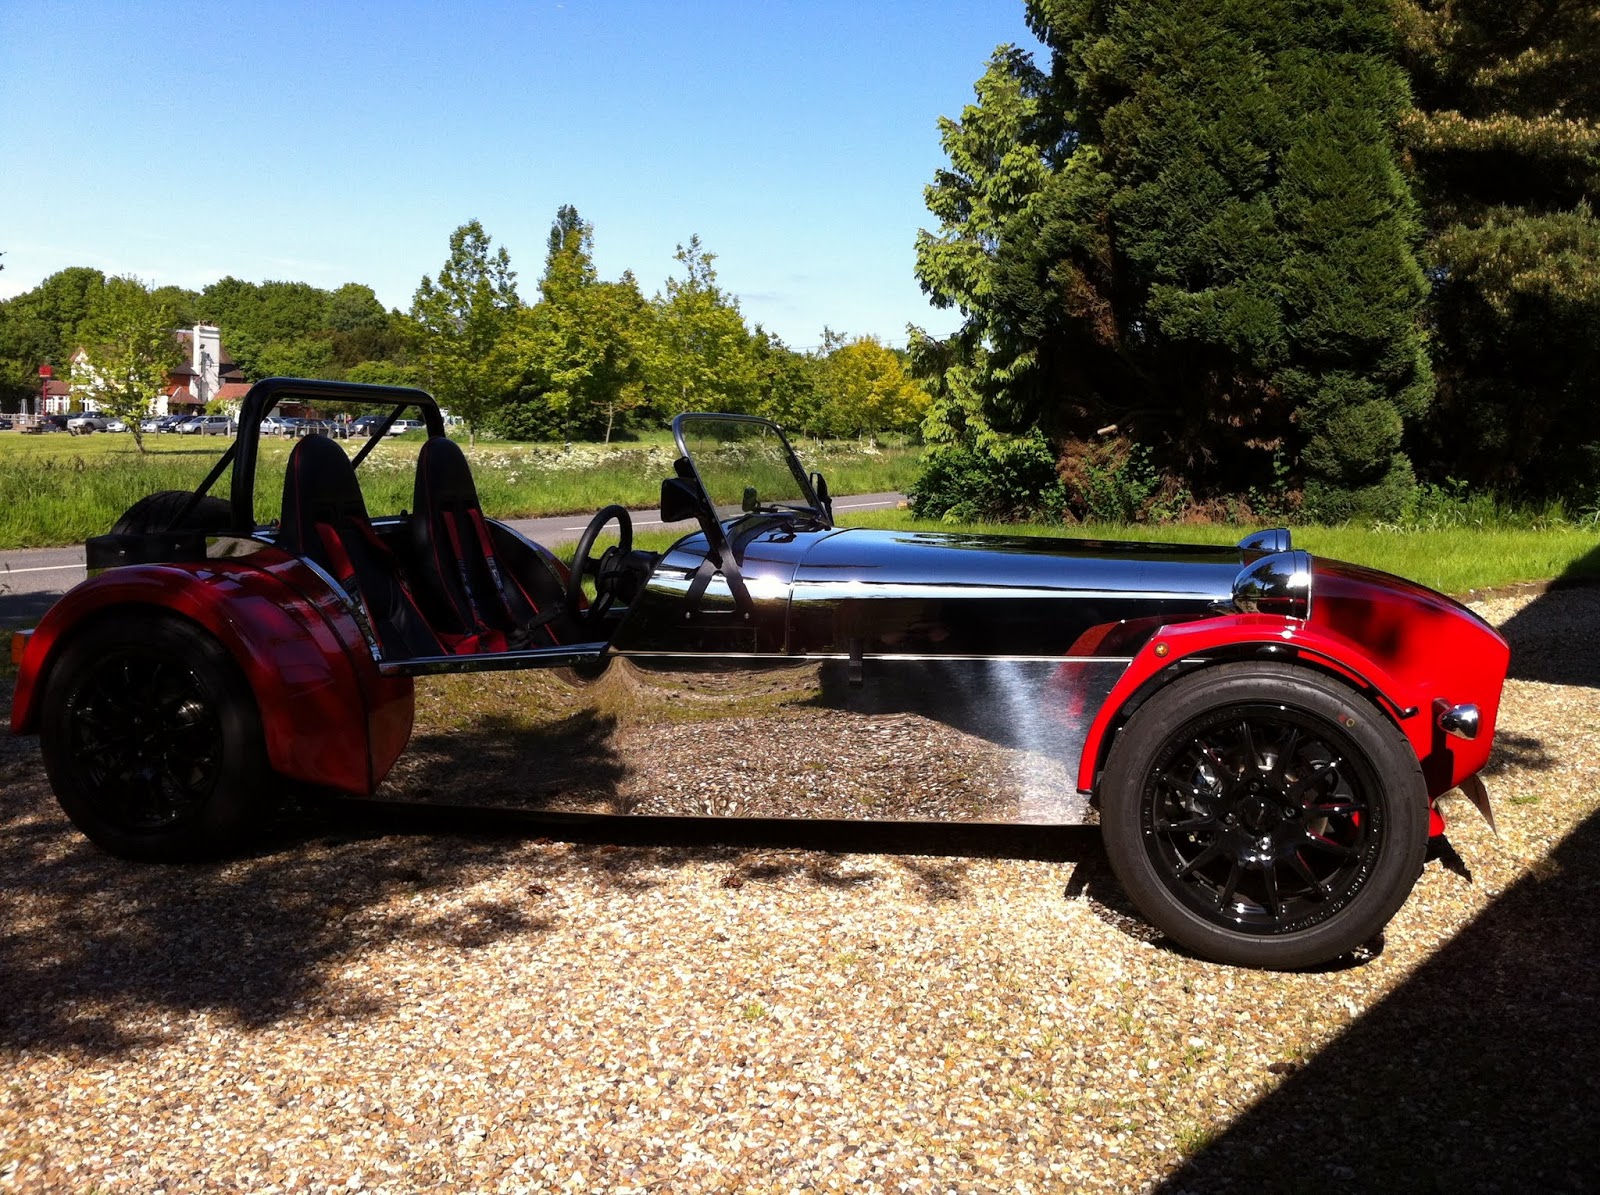
The original wing mirror mounting holes were plugged with grommets, wing mirror stalks attached to the windscreen uprights and all bolted to the scuttle. My wife helped manoeuvre the windscreen assembly into place & its held either side with 5x flanged button head bolts which were already tapped into the frame and checked for length:


Very cool.. :)